ArtsAutosBooksBusinessEducationEntertainmentFamilyFashionFoodGamesGenderHealthHolidaysHomeHubPagesPersonal FinancePetsPoliticsReligionSportsTechnologyTravel

i love you message in a bottle

Updated on February 26, 2013

Craft Your Own "Message in a Bottle" Bottle

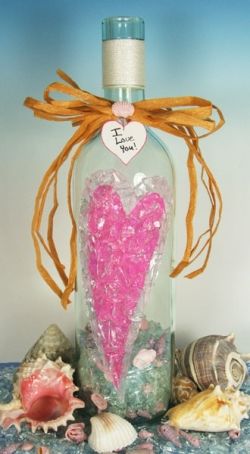
Crafting your own "Message in a Bottle" for sending a sentimental love letter is a memorable way to say "I Love You!"

Share your love with that special someone in your life by creating a Stained Glass Mosaic keepsake in which you can send a passionate letter of love. The bottle partially filled with sea shells and sea glass adds to the romantic lure of a beach side romance, while the decoupaged glass mosaic heart declares your love is everlasting. The greatest gifts are those that are handmade and those love letters and notes that are hand written in your own words.

Make your relationship special, create a gift that will bring beautiful memories for years to come.

Create a keepsake, a prized possession that instills the deepest most devout emotions that only a hand crafted present can bring.

Give your true love a gift that will be cherished forever.

Make it Memorable.

Make it Romantic.

Make it Forever.

Valentine Heart
Valentine Heart

To Make Your Message Bottle

You will the following items.

One empty clear wine bottle with cork (local restaurants and bars are a good source to get a freebie...empty one of course).

To Decorate the Bottle you will need:

1. Two colors of tissue paper to make the decoupaged heart. I used a light and a dark pink(for guys I would suggest deeper reds).

2. 1 pkg. of 2 1/2 oz.Stained Glass MiniCobblets Crystal Clear for covering the hearts. These can be purchased on Amazon.

3. Decoupage Paste, Gloss or Matte finish.

4. Clear Glass Adhesive such as E6000.

5. 6 ft. of cording, twine or thin rope for wrapping the bottle neck.

6. Scissors, pencil, waxed paper.

7. A brush to apply the decoupage paste.

8. A wooden craft stick or toothpick to apply the glass adhesive.

9. An old towel to cradle the bottle so it won't roll while decorating it.

For the bottle filler you will need:

1. 1-pkg. of 2 1/2 oz. Stained Glass MiniCobblets Crystal Clear.

2. Pink dyed small seashells.

For your note:

1. Attractive note paper. Appearance counts on the heartbeat scale!

2. A good writing pen with black or blue ink.

3. 3 ft. of ribbon or string to tie your note.

4. 2- paper clips

Photo Tutorial On Crafting Your Message Bottle

Click thumbnail to view full-size
2. Using your craft stick, apply a small amount of glue onto an area about an inch square. Sprinkle a pinch of Mini-Cobblets on top of the glue, pushing them in place in a single layer making sure they are in contact with the adhesive.  Repeat this s3.Starting at the top of the bottle neck just below the lip dab a bit of glass glue (back side of bottle) to hold the cord in place, begin to wrap downward (see photo) until you have reached the desired wrap width, glue the cord end to finish. (Start4. The finished bottle wrap.5. To fill your bottle with Glass Cobblets and seashells first make a paper funnel. Using a piece of typing or writing paper roll it into a cone shape making sure that one end is a small enough diameter to easily fit into the bottles neck while the t6. Roll your finished letter into a tube that will easily fit into the neck of the bottle. I like to use a pencil to wrap the paper around to give it a nice even tube shape. Once rolled hold it in place with paperclips on either end. Take your ribbon7. Take the longer length and coil up around the letter (see photo). Securely tie the two ends together ending with a bow. Note: It is very important to make sure your letter does not uncurl in the bottle making it impossible to get back out. You don1. Using a piece of tissue paper the length and width of the bottle place it on the bottle and draw your heart designs. Using two shades of pink tissue cut out two hearts--one 1/2" larger than the other. Using decoupage paste glue the larger heart an
2. Using your craft stick, apply a small amount of glue onto an area about an inch square. Sprinkle a pinch of Mini-Cobblets on top of the glue, pushing them in place in a single layer making sure they are in contact with the adhesive.  Repeat this s
2. Using your craft stick, apply a small amount of glue onto an area about an inch square. Sprinkle a pinch of Mini-Cobblets on top of the glue, pushing them in place in a single layer making sure they are in contact with the adhesive. Repeat this s
3.Starting at the top of the bottle neck just below the lip dab a bit of glass glue (back side of bottle) to hold the cord in place, begin to wrap downward (see photo) until you have reached the desired wrap width, glue the cord end to finish. (Start
4. The finished bottle wrap.
5. To fill your bottle with Glass Cobblets and seashells first make a paper funnel. Using a piece of typing or writing paper roll it into a cone shape making sure that one end is a small enough diameter to easily fit into the bottles neck while the t
6. Roll your finished letter into a tube that will easily fit into the neck of the bottle. I like to use a pencil to wrap the paper around to give it a nice even tube shape. Once rolled hold it in place with paperclips on either end. Take your ribbon
7. Take the longer length and coil up around the letter (see photo). Securely tie the two ends together ending with a bow. Note: It is very important to make sure your letter does not uncurl in the bottle making it impossible to get back out. You don
1. Using a piece of tissue paper the length and width of the bottle place it on the bottle and draw your heart designs. Using two shades of pink tissue cut out two hearts--one 1/2" larger than the other. Using decoupage paste glue the larger heart an
How to make a message in a bottle craft.

Directions For Decorating Your Message Bottle

Part 1. Decoupage.

1. Thoroughly clean your bottle removing all labels and glue. A cleaning solution such as Goo Gone can help remove any residual glue. Soaking the bottle in water overnight usually helps remove the labels. Dry completely inside and out.

2. Cradle your bottle in a towel laying it down on your work surface. The towel will help keep it from rolling.

3. Using a piece of tissue paper the length and width of the bottle place it on the bottle and draw your heart design. The heart I used was approximately "wide by "long. This first drawing will become a template for cutting out your base (largest) Valentine.

Note: You will need two tissue hearts, the larger base heart should be the lightest shade, with the smaller heart a darker shade. This will give your finished piece a Stained Glass appearance.

4. Draw a smaller heart inside the first making it about " smaller. Use this design to cut out your second darker heart.

5. Lay your base tissue on top of your template to mark your cutting pattern, do the same for your smaller heart. Cut out your tissue hearts and set aside. Note: Tissue paper tears easily when wet with the decoupage paste, you may want to cut out a couple of extra pieces as backups.

6. Lay down a piece of wax paper an inch or two bigger than your largest heart as a work surface for decoupaging. Following the manufacturers directions brush a coating of decoupage paste onto the back side of your base(largest) heart. Lift the wax paper/heart and carefully position the heart on to the bottle. Gently rub the heart to adhere it to the glass, then carefully separate the wax paper from the tissue heart. Gently brush on another coat of decoupage paste making sure you cover the edges.

Note: It is okay to get the paste onto the glass, it can be easily removed once dried.

7. Repeat with the smaller tissue heart. Let dry.

Once the decoupage paste is dry it is time to glue the Stained Glass MiniCobblets. A fun and quick final touch to give your Valentine Bottle a Romantic Stained Glass Look. See Part 2 below.

Stained Glass Cobbles Crafting Your Own Message in a Bottle

Cobbling Your Bottle

Part 2. Mosaic

Using a simple mosaic technique your bottle is about to evolve into a Romantic Keepsake. Easily adhere the Crystal Clear Stained Glass Mini-Cobblets over your decoupaged hearts.

1. Lay your bottle down, cradled in the towel to keep it from moving.

2. Using your craft stick, apply a small amount of glue onto an area about an inch square.

3. Sprinkle a pinch of Mini-Cobblets on top of the glue, pushing them in place in a single layer making sure they are in contact with the adhesive.

4. Repeat this step to cover the entire heart.

Note: MiniCobblets are various sized small pieces of glass. Their edges have been softly rounded for safe handling. I use the larger pieces to form the Valentine's outline, filling in the center with what is left. When gluing try to keep the adhesive on the decoupaged heart and check often that none of the glass cobblets have moved.

5. Let dry in place on the towel.

6. Clean the bottle of any excess decoupage paste. A fingernail works great!

Now for the final touches! See below.

Stained Glass Cobbles Message in a Bottle Craft Tutorial

Completing Your Message Bottle

Part 3. Neck Wrap & Bottle Fill

1. Wrap the neck of the bottle with cording, rope, or ribbon. I used a white nylon cord found in most hardware stores. For a more rustic look use natural colored twine. Starting at the top of the bottle neck just below the lip dab a bit of glass glue (back side of bottle) to hold the cord in place, begin to wrap downward (see photo) until you have reached the desired wrap width, glue the cord end to finish. (Start and finish on the back side of the bottle)

2. To give your bottle a bit of ocean mystique add a pack of Crystal Clear Stained Glass MiniCobblets mixed with small sea shells. The clear minis will add a bit of sparkle with the reminiscence of sea-glass, the shells add a bit of romance giving way to thoughts of a moon lit beach rendezvous.

To fill your bottle with Glass Cobblets and seashells first make a paper funnel. Using a piece of typing or writing paper roll it into a cone shape making sure that one end is a small enough diameter to easily fit into the bottles neck while the top end is large enough to easily feed the glass and seashells. You can either pour the MiniCobblets into the bottle first followed by the seashells for a layered effect or mix them together as you pour.

3. Place your hand written note lovingly inside the bottle making sure that it is tightly rolled and bound with ribbon so that it can easily be removed. This is the most important part of your Valentine and will be treasured by the one you love for the heart-felt words that you write. Be honest, be true, and most importantly be you. Remember to write from your heart.

Roll your finished letter into a tube that will easily fit into the neck of the bottle. I like to use a pencil to wrap the paper around to give it a nice even tube shape. Once rolled hold it in place with paperclips on either end. Take your ribbon or string and run it through the paper tube (see photo). Measure one end of ribbon to the length of the letter and secure under the paper clip. Take the longer length and coil up around the letter (see photo). Securely tie the two ends together ending with a bow. Note: It is very important to make sure your letter does not uncurl in the bottle making it impossible to get back out. You don't want unwanted frustration to ruin the moment.

.

Writing A Valentine Letter

Writing A Love Letter

Composing a love letter can be a bit frustrating. For a few tips and suggestions on how you can write the perfect love letter check out the article on Writing Letters of Love

Love Letters Video - A Cute And Very Funny Animated Proposal

working

This website uses cookies

As a user in the EEA, your approval is needed on a few things. To provide a better website experience, hubpages.com uses cookies (and other similar technologies) and may collect, process, and share personal data. Please choose which areas of our service you consent to our doing so.

For more information on managing or withdrawing consents and how we handle data, visit our Privacy Policy at: https://corp.maven.io/privacy-policy

Show Details
Necessary
HubPages Device IDThis is used to identify particular browsers or devices when the access the service, and is used for security reasons.
LoginThis is necessary to sign in to the HubPages Service.
Google RecaptchaThis is used to prevent bots and spam. (Privacy Policy)
AkismetThis is used to detect comment spam. (Privacy Policy)
HubPages Google AnalyticsThis is used to provide data on traffic to our website, all personally identifyable data is anonymized. (Privacy Policy)
HubPages Traffic PixelThis is used to collect data on traffic to articles and other pages on our site. Unless you are signed in to a HubPages account, all personally identifiable information is anonymized.
Amazon Web ServicesThis is a cloud services platform that we used to host our service. (Privacy Policy)
CloudflareThis is a cloud CDN service that we use to efficiently deliver files required for our service to operate such as javascript, cascading style sheets, images, and videos. (Privacy Policy)
Google Hosted LibrariesJavascript software libraries such as jQuery are loaded at endpoints on the googleapis.com or gstatic.com domains, for performance and efficiency reasons. (Privacy Policy)
Features
Google Custom SearchThis is feature allows you to search the site. (Privacy Policy)
Google MapsSome articles have Google Maps embedded in them. (Privacy Policy)
Google ChartsThis is used to display charts and graphs on articles and the author center. (Privacy Policy)
Google AdSense Host APIThis service allows you to sign up for or associate a Google AdSense account with HubPages, so that you can earn money from ads on your articles. No data is shared unless you engage with this feature. (Privacy Policy)
Google YouTubeSome articles have YouTube videos embedded in them. (Privacy Policy)
VimeoSome articles have Vimeo videos embedded in them. (Privacy Policy)
PaypalThis is used for a registered author who enrolls in the HubPages Earnings program and requests to be paid via PayPal. No data is shared with Paypal unless you engage with this feature. (Privacy Policy)
Facebook LoginYou can use this to streamline signing up for, or signing in to your Hubpages account. No data is shared with Facebook unless you engage with this feature. (Privacy Policy)
MavenThis supports the Maven widget and search functionality. (Privacy Policy)
Marketing
Google AdSenseThis is an ad network. (Privacy Policy)
Google DoubleClickGoogle provides ad serving technology and runs an ad network. (Privacy Policy)
Index ExchangeThis is an ad network. (Privacy Policy)
SovrnThis is an ad network. (Privacy Policy)
Facebook AdsThis is an ad network. (Privacy Policy)
Amazon Unified Ad MarketplaceThis is an ad network. (Privacy Policy)
AppNexusThis is an ad network. (Privacy Policy)
OpenxThis is an ad network. (Privacy Policy)
Rubicon ProjectThis is an ad network. (Privacy Policy)
TripleLiftThis is an ad network. (Privacy Policy)
Say MediaWe partner with Say Media to deliver ad campaigns on our sites. (Privacy Policy)
Remarketing PixelsWe may use remarketing pixels from advertising networks such as Google AdWords, Bing Ads, and Facebook in order to advertise the HubPages Service to people that have visited our sites.
Conversion Tracking PixelsWe may use conversion tracking pixels from advertising networks such as Google AdWords, Bing Ads, and Facebook in order to identify when an advertisement has successfully resulted in the desired action, such as signing up for the HubPages Service or publishing an article on the HubPages Service.
Statistics
Author Google AnalyticsThis is used to provide traffic data and reports to the authors of articles on the HubPages Service. (Privacy Policy)
ComscoreComScore is a media measurement and analytics company providing marketing data and analytics to enterprises, media and advertising agencies, and publishers. Non-consent will result in ComScore only processing obfuscated personal data. (Privacy Policy)
Amazon Tracking PixelSome articles display amazon products as part of the Amazon Affiliate program, this pixel provides traffic statistics for those products (Privacy Policy)
ClickscoThis is a data management platform studying reader behavior (Privacy Policy)